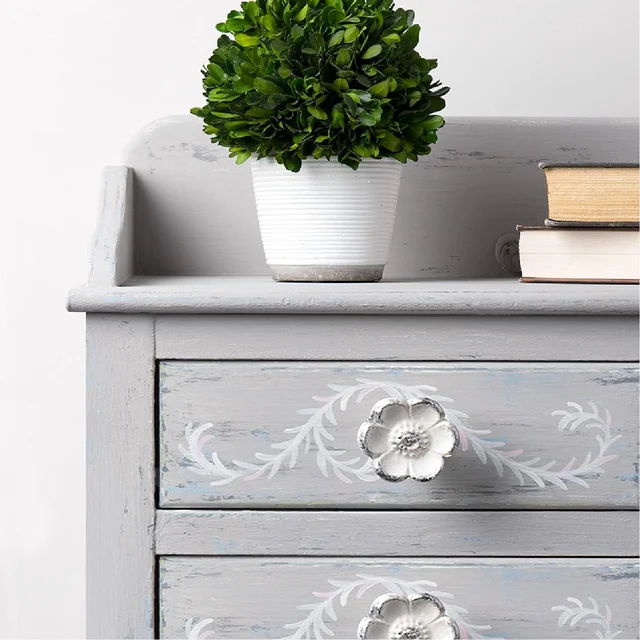
A good furniture makeover begins before the paintbrush comes out. Choose a sound piece, decide how much wear you want to show, and make a small sample of the paint and finish together. That gives you a reliable plan for the whole object, from the first cleaned drawer front to the last buffed edge.
Our Home Décor Chalk range creates an ultra-matte decorative finish. It can suit a quiet, solid-color piece or a layered, worn-looking accent. This guide focuses on a manageable indoor project: a small side table, shelf, frame or drawer front. You will find a preparation checklist, a sensible order of work, a sample project plan and ways to diagnose common problems without adding another coat at random.
1. Choose the piece before choosing the white
Look at the furniture from several angles, open its drawers and examine the underside. Paint changes a surface; it does not straighten a loose joint or hold down lifting veneer. Identify those problems while you can still handle the piece freely. If repair needs clamps, glue or replacement hardware, complete that work before you start the decorative finish.
For a first project, favor a modest size and straightforward shape. A narrow side table with four simple legs gives you fewer corners to manage than an ornate dresser. A frame offers a smaller commitment, although detailed molding will take more brush control. Neither choice is automatically easier for everyone: choose the one you can turn, support and reach comfortably.
Separate sentimental value from practice value. An irreplaceable heirloom deserves a more cautious approach than an inexpensive modern accessory. If the existing finish has historical value or you cannot identify it, seek appropriate restoration advice before altering it. You can learn the paint technique on a spare board while deciding what should happen to the original object.
Write a one-sentence brief: “An indoor bedside table, soft white, mostly smooth, with very light wear on the outer edges.” That sentence becomes your reference when a tempting extra stencil, color or texture appears halfway through. For a broader comparison of formulas, start with our guide to choosing FolkArt paint.
2. Know what a chalk finish will—and will not—do
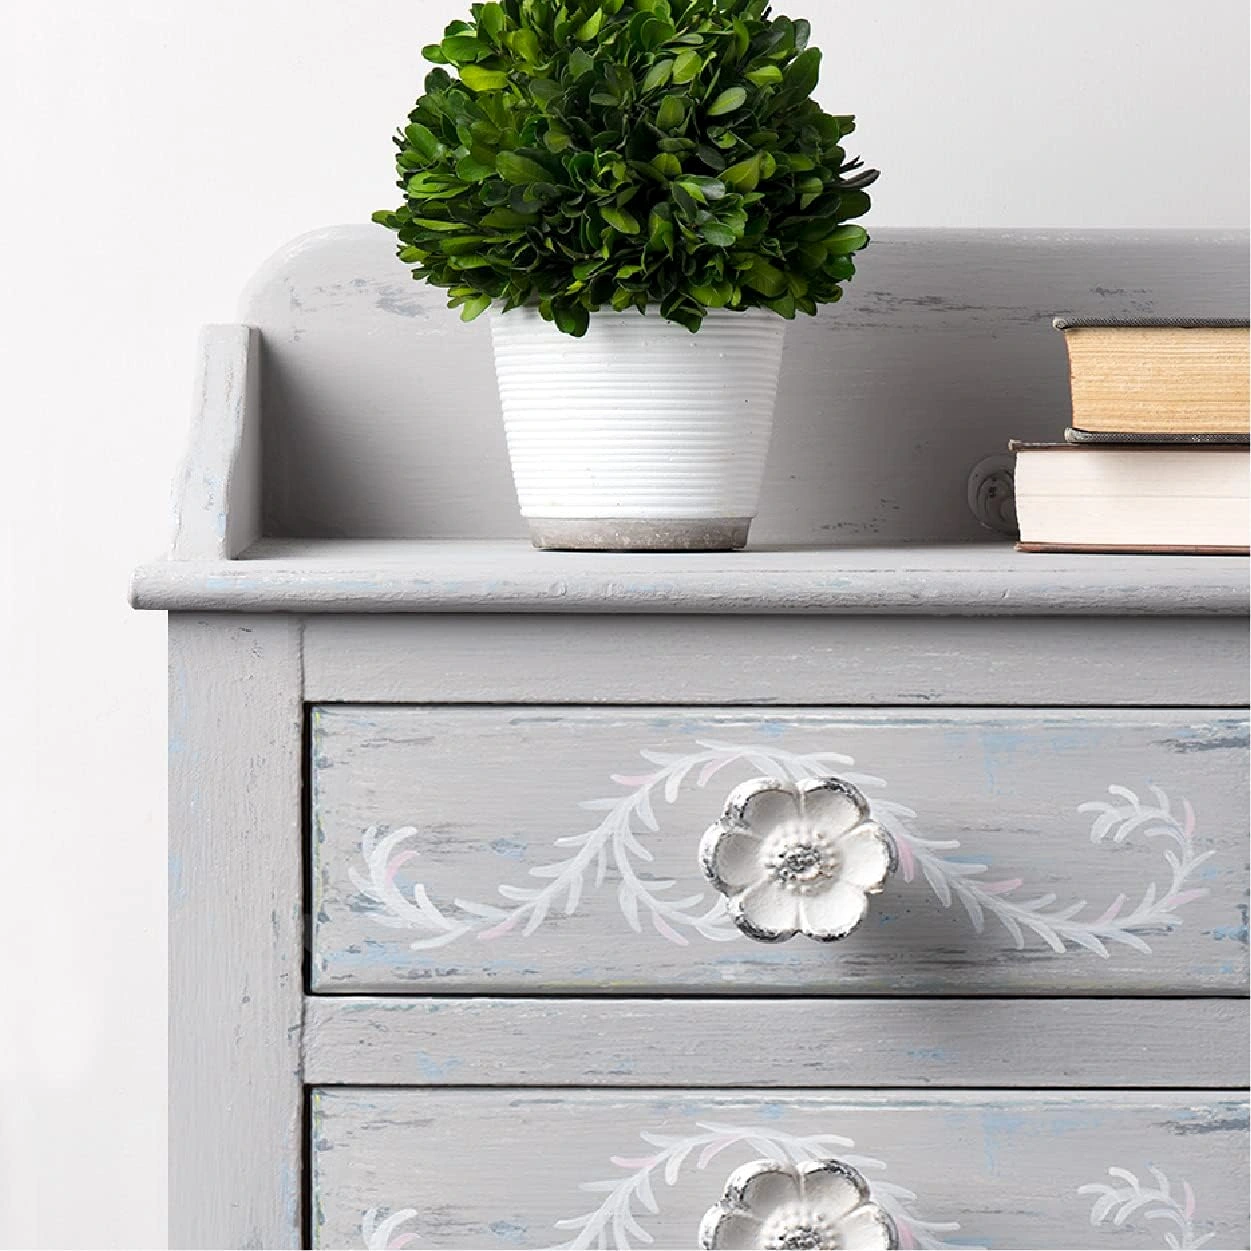
Home Décor Chalk is a chalk-finish acrylic paint. Its matte appearance belongs to the decorative coating; it is not a chalkboard surface intended for writing and erasing. Decide whether you want an even finish, a layered contrast or a few deliberately worn edges. These are different design choices, and a successful plain finish does not need distressing to look complete.
Plaid describes the formula as requiring minimal preparation and being suitable for layering and distressing. Minimal preparation still leaves a job for cleaning, checking the old coating and making a test patch. The manufacturer's Home Décor Chalk product guidance also identifies the line's indoor-use scope. Do not extend a furniture project onto an exposed porch merely because the color looks appropriate there.
“For indoor use only”
— Plaid, Home Décor Chalk product instructions
The finish you choose after painting can alter both sheen and color perception. Judge the complete paint-and-finish sample rather than the freshly brushed color alone. Hold it next to the fabric, wall or wood that will surround the finished piece. Morning daylight and a warm bedside lamp may give the same white a noticeably different context.
3. Assemble a small, useful kit
You need room to put the object down as well as tools to paint it. Clear a stable work surface and an adjacent drying area before opening any bottles. Cover the worktop, keep clean cloths separate from dirty ones, and use containers that belong to the craft area. A tidy arrangement makes it easier to notice a drip or a forgotten lower edge.
A brush that fits the furniture matters more than a large collection of brushes. Choose one for the main panels and a smaller one for narrow recesses. Add a suitable cleaning method for the existing surface, a container for removed screws, and material for a sample. If you plan to distress the finish, reserve a separate sanding tool for that stage.
Browse our chalk paint and wax collection with the project dimensions beside you. The White Adirondack selection contains 16 fl oz; Cottage White contains 8 fl oz. Those are different colors and bottle sizes, not interchangeable names for one white. The area you can cover depends on the substrate, application and number of coats, so use the selected label rather than an assumed universal coverage figure.
On a small screen, swipe the table sideways. With a keyboard, focus the table and use the arrow keys.
| Task | Prepare | Check before starting |
|---|---|---|
| Cleaning | Suitable cleaner and clean cloths | Compatibility with the existing surface |
| Painting panels | A comfortably sized brush | Reach around edges and beneath the apron |
| Painting details | A smaller brush | Access to molding without flooding recesses |
| Sampling | Similar scrap or a hidden test area | Same preparation and finish as the real piece |
| Finishing | Selected finish and dedicated applicator | Label directions and a clear drying space |
4. Prepare for adhesion, not just appearance
Remove detachable knobs and pulls where practical. Put each group's screws in a labeled container, especially when several drawers look alike. Photograph the arrangement before taking it apart. Avoid coating moving parts, drawer runners and tight fitting edges simply to make everything the same color; a decorative layer should not prevent the furniture from working.
Clean the areas people touch as carefully as the visible top. Handles, the edge of a drawer and the underside of a table lip can collect residues that a quick dusting misses. Follow the cleaner's directions, remove any residue it requires you to remove, and let the surface dry. Our surface preparation page is a useful place to compare different materials before selecting a method.
Inspect any existing coating that is peeling or lifting. Painting over an unstable layer leaves that weak layer underneath your new work. For an unknown old painted finish, avoid sanding or creating dust until you know how it should be handled. A new, clearly identified practice surface is a better place to learn distressing than an uncertain vintage coating.
Do an adhesion trial on an inconspicuous area with the actual preparation and paint you intend to use. Let it develop according to the label before judging it. A test made on raw scrap wood will tell you about color and brush marks, but it cannot establish adhesion to the glossy coating on your table. Give each sample a specific question to answer.
5. Make a sample that answers the real questions
Divide a small board or test area into useful comparisons. One section can show the paint alone; another can carry the intended finish. If you are considering distressing, create a third section with a small amount of the underlying color exposed. Label the reverse with the formula, color, preparation and coat order so the result stays understandable later.
Keep the application close to the planned project. A tiny dab applied with a fingertip cannot show how a broad brush will behave on a drawer front. Make a few full strokes, include an edge, and allow the layers to dry between stages. The goal is a repeatable method, not the most flattering possible swatch.
Compare White Adirondack and Cottage White on physical samples if their difference matters to the room. A phone display, product bottle photograph or unrelated furniture image cannot settle the choice accurately. Place the samples beside existing trim rather than holding them in isolation. A color that looks neutral by itself may appear warmer or cooler next to another white.
Keep the approved sample near the workbench. If the finished piece begins looking too busy, return to the original decision before adding another treatment. That small reference can save more time than trying to remember exactly how much paint you loaded on the first successful stroke.
6. Paint in an order you can keep
Plan your route around the piece while it is still dry. On a small table, that may mean working through the inside edges and legs before finishing the broad top. On a frame, it may mean the recesses before the outer flat areas. The useful order is the one that lets you reach the next section without resting a hand against fresh paint.
Put a modest amount of paint on the brush and work it across a manageable section. Watch the opposite edge for a bead of paint as you go. A drip is easier to address while that area is still workable than after you have moved on and forgotten it. Keep the brush appropriate to the space instead of forcing a large loaded brush into a narrow corner.
Once a section begins to drag under the brush, resist endlessly smoothing it. Let the coat dry as directed, assess it in good light, and make your next decision then. An imperfect wet-looking area does not always need immediate intervention. Pay attention to edges, recesses and joints as well as the center of the panel.
Plaid's Refurbished Table tutorial separates its paint layers with drying periods and leaves the painted design overnight before waxing. Treat its timings as that project's instructions, alongside the directions on your own products. Temperature, humidity and application thickness can affect a project; a clock alone cannot confirm that every heavy corner is ready.
7. Distress with a reason—or leave the finish clean
Distressing works best when you can explain where the wear would occur. Handles, outer corners and a projecting edge suggest natural contact. A large random patch in the center of a protected panel may be less convincing. Mark your intended areas on a photograph or simple sketch before you start, particularly if several drawers need to look related.
Begin with one small area and pause to view the whole piece. It is easier to add a little more wear than to recover an overworked pattern consistently. Decide whether you want to reveal a contrasting painted layer or the known substrate below. Those results have different color effects, even when the worn patch has the same shape.
Remove the resulting residue using a method appropriate to the material and coating before applying a finish. Avoid turning distressing into an attempt to hide adhesion failure: deliberate decorative wear and paint that lifts unexpectedly are different problems. If a large area separates from the old surface, stop and reconsider the preparation rather than repeating that failure across the furniture.
8. Apply and assess the finishing layer
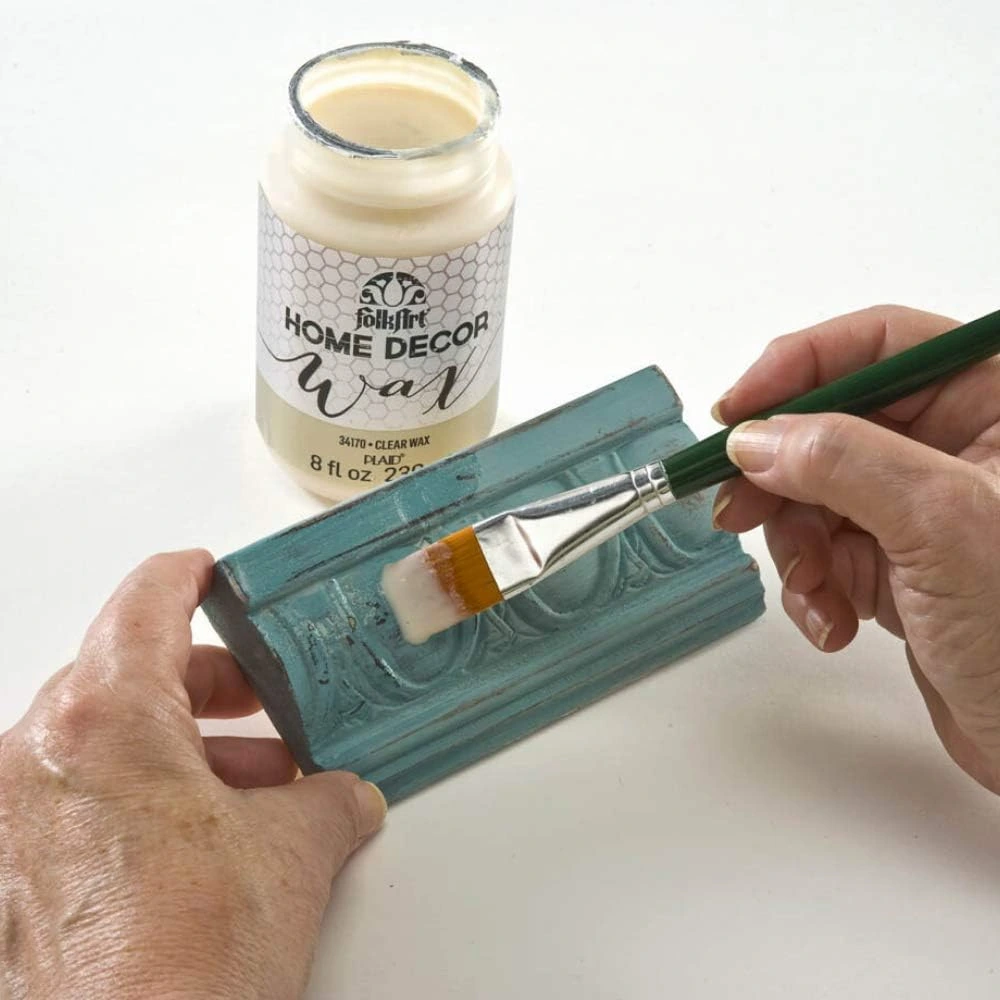
Choose the finish before you reach this stage, and check that it is intended for the paint and use you have selected. Our Home Décor Clear Wax is one option in the collection. It is a finishing product, not another white paint and not a promise that a decorative piece can tolerate every household use.
Practice its application on your painted sample first. Work in an area small enough to control, paying particular attention to carved details and corners where product can collect. Use the amount and method on the bottle. A heavy application is not automatically a better protective layer, and repeated work over a partly set area can make the result harder to judge.
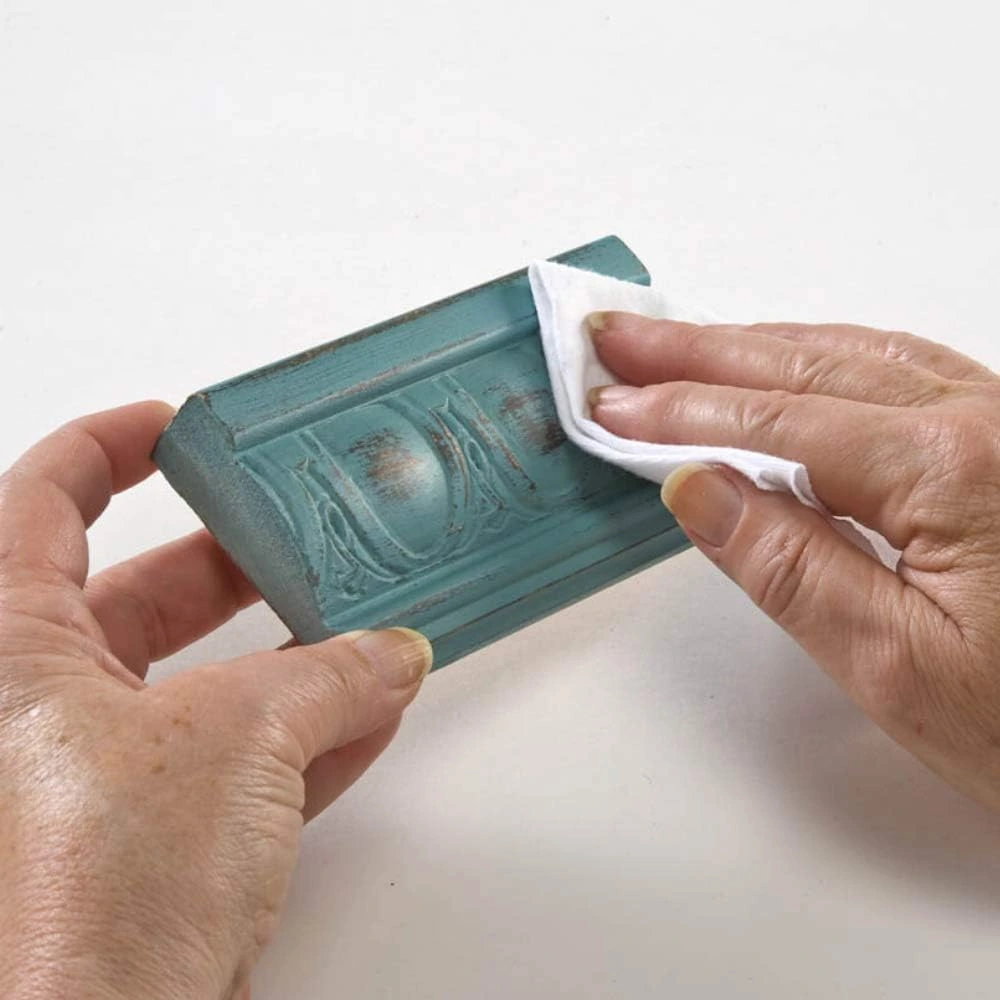
“Buff waxed table using a clean, lint-free soft cloth”
— Plaid, Refurbished Table finishing instructions
The cited project allows its waxed coat to dry for 24 hours before buffing. Your own product label remains the instruction for your selected finish, including the later cure and care period. Look at the surface under a raking light to assess consistency, then examine it again from the normal viewing angle. Do not mistake a change in reflected light for a change in paint coverage.
9. Build a schedule with stopping points
Split the project by milestones rather than promising yourself it will be complete in one afternoon. Cleaning, drying, sampling, painting and finishing each deserve a clear stopping point. The time spent actively brushing may be short; the time before a piece is ready for everyday use can be much longer. Keep both in your plan.
The following schedule is an organizational example, not a replacement for bottle directions. It deliberately leaves the actual waiting periods to the products and conditions. Use a note beside the piece to record which stage is complete. That is especially helpful if you are working on two furniture items that were painted at different times.
On a small screen, swipe the table sideways. With a keyboard, focus the table and use the arrow keys.
| Session | Work | Before moving on |
|---|---|---|
| Plan and prepare | Repair, remove hardware, clean and label | Surface is sound and dry |
| Sample | Try the full paint-and-finish combination | Appearance and adhesion are acceptable |
| Paint | Apply controlled coats in a planned order | Each layer meets its drying instructions |
| Decorate and finish | Add chosen details, then the compatible finish | Paint is ready for finishing |
| Return to use | Reassemble and place the furniture | Finish has completed its required cure |
10. Diagnose before repainting
If coverage looks uneven, first compare the surface under consistent light. Are you seeing the old color through a thin coat, brush texture reflecting light, or actual missing paint? Those observations lead to different next steps. Let the coat reach its specified dry stage before deciding whether an additional controlled coat is needed.
If marks appear around a drawer pull, consider the preparation and handling in that area. It may have carried more residue than the middle of the drawer, or been touched while still curing. Repeating the original sequence without investigating the cause can reproduce the same defect. Make a small corrected trial before committing the entire front again.
If the finishing layer looks patchy, review the sample and application directions. Check whether some areas received more material or different buffing. Avoid adding an unrelated topcoat as an automatic rescue. A new material introduces another compatibility question and can change the look you were trying to preserve.
For a formula-specific question, keep the product name, color, surface and sequence of work together when contacting product support. A clear description of what happened is more useful than saying the paint “did not work.” Include whether the problem appeared during application, drying, finishing or normal use.
11. Reassemble, place and keep a useful record
Once the finish is ready, reattach hardware carefully and check moving parts without forcing them. Keep the approved sample and a short note of the products used. If a future repair becomes necessary, you will know which white, which finish and which application order produced the original result.
Choose care that fits the finish and the furniture's use. Follow the label's cleaning and maintenance instructions, and avoid putting a freshly finished piece straight into demanding service. A decorative shelf and a frequently wiped dining surface do not ask the same thing of a coating. Match the intended use to the system you have actually selected.
For the next project, change one variable at a time. Try a different white, a simpler edge treatment or a new handle rather than changing everything together. If you want a more sculptural surface on a separate decorative object, our textured paint guide explains the distinction between raised acrylic marks and a fine terra cotta effect. For glass accessories beside your finished furniture, use the separate glass painting guide; its preparation and curing instructions belong to a different formula.
Your next useful step is small: select a sound indoor piece and make the complete finish sample. Keep the sample you like, choose the matching paint and finishing product, and give the furniture enough time between stages to keep that result consistent.